
Patch: 7.41
I read this as a normal ranked game, so economy, timings, deaths, and objective conversion all carry their usual weight. Your lane role was an uphill offlane matchup, and the game eventually ran past the enemy's earlier power curve. The important read is how you used the space and initiation your position was supposed to provide.
Keep using 20-plus creep-aggro commands to hold contested lane access.
Keep opening fights when your team is actually nearby.
Keep converting personal smokes into a visible pickoff.
Keep taking the front and absorbing enemy proximity pressure away from Slark.
Keep entering fights with usable mana.
The opening stayed nearly even. Your lane produced a small team deficit by 10:00, but your own offlane farm was healthy and your team took the first mid tower at 9:50. TF3 converted into two towers, giving you the cleanest stretch of the game.
The turn arrived in the midgame. The team was already 4.7k behind by 24:00, then your team secured Roshan at 28:13 and briefly pulled the deficit back toward 1.8k. That recovery needed a controlled reset around the Aegis window. Instead, the 30:28, 31:48, and 33:10 fight chain created the decisive 13.3k swing against you. The win at TF12 was excellent execution from a bad state, but it happened deep in your own territory with no reachable building afterward.
After Juggernaut completed Aghanim's Scepter at 33:58 and Butterfly at 31:31, the remaining fights became a physical-survival test. The late game ended with the enemy using a large building lead and an Aegis-backed push.
The early causal thread was favorable. You opened TF1 on Juggernaut, your team won the river exchange, and TF3 gave you the only clear objective conversion beyond Roshan. Those fights showed the intended shape: your front line created a target, Lion and Sniper supplied control and damage, and Slark had room to follow.
The middle thread broke when the enemy's initiators began opening on your back line and your team answered without a stable formation. TF2 and TF6 were lost immediately after Enchantress or Storm Spirit opened on Sniper or Lion. You were split from the team at TF2 and TF3, and the team did not have all five bodies together when those fights started.
The decisive late thread was the chain from TF10 through TF13. At TF10, the team was only three heroes at the whistle. At TF11, Juggernaut opened on you and four of your heroes died in the first twelve seconds. TF12 was a strong response, with you dealing the most damage in the winning fight, but the conversion window was closed because the fight occurred deep in your own territory.
Your role in the decisive threads was mixed. You drove the one clean late win at TF12 and repeatedly absorbed the enemy's attention, but your deaths at TF10, TF11, and TF13 made the enemy's siege easier. The team-level collapse was amplified by Lion's repeated deaths, while your controllable contribution was the late regroup and defensive purchase that never arrived before the final chain.
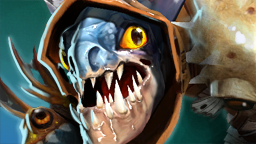
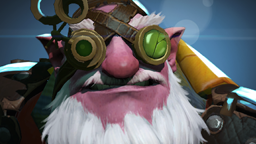
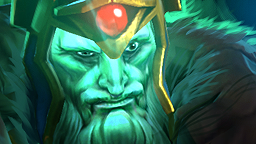
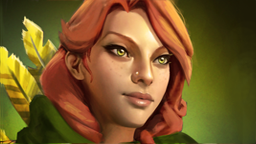
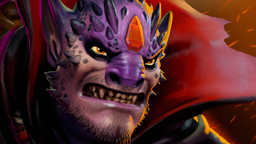
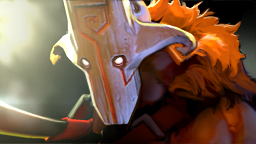
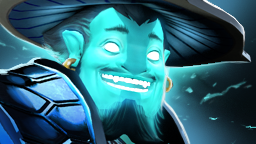
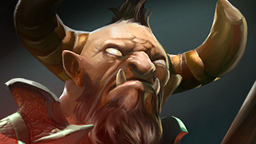
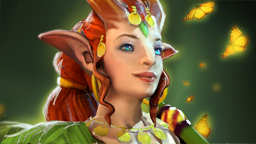
Your lineup had four pickoff tools around two scaling cores. You were the front-line bridge between Windranger, Sniper, Slark, and Lion. The clean combo was Wraithfire Blast into Shackleshot, Earth Spike, or Pounce, followed by the right-click damage from Slark and Sniper.
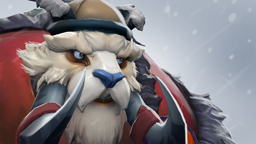
The enemy's early-mid curve was sharper. Centaur Warrunner and Tusk could force the first contact, Storm Spirit could reach your back line, and Enchantress's converted neutral creeps created early pressure and sustain. Juggernaut was the late physical threat, especially after Manta Style, Butterfly, and Aghanim's Scepter.
Your draft needed to make the midgame count before the enemy carry completed its full physical package. That meant using Reincarnation as permission to start fights, then buying enough survivability to survive the second wave of control. Your team did not have a clean front-to-back defense once the enemy reached high ground, so the safest fight was a grouped pickoff around your stun chain, not a deep solo route.
The direct comparison with Centaur Warrunner is useful because you played the same position in the same game.
You were slightly ahead in lane CS, and you moved more efficiently across the living map. The gap was experience, deny pressure, and sustained income. Centaur Warrunner also reached 3.5k building damage while your total was 805, which shows how much more often he turned his front-line presence into structure pressure.
The sharpest improvement is not copying his farm. It is turning your lane access and fight presence into a building or forced retreat after the first successful initiation.
The decisive window was 28:13 to 33:10. Roshan gave your team a brief recovery, and Slark picked up the Aegis immediately. The next objective was not a forced tower hit from the pit. It was a five-man reset that used the Aegis to control the next enemy approach.
Instead, TF10 started with only three of your heroes, then TF11 began with Juggernaut opening on you while four of your team died in the first twelve seconds. The better line was to concede the exposed side of the map, bring all five heroes under one tower, and make the enemy spend its early curve into your Reincarnation front line.
—Lost attrition trade — You entered at 14% HP. Reset for regen before contesting the next trade.
—Blind deep position with free revive — Move through ally vision after the enemy side goes dark, even when Reincarnation gives you a first life.
2sLast man standing — Leave when the first exchange is lost instead of holding the enemy side alone.
—Blind magic burst — Use your wand and move toward the nearest ally when Storm Spirit's fight turns.
10sVisible collapse — Take the safe side of the wave instead of accepting Centaur Warrunner's full collapse.
—Blind mixed burst — Enter after the enemy opener, with a magic-survival item and an ally close enough to follow.
3sPhysical burst from Omnislash — Break line of sight and retreat toward your team when Juggernaut commits Omnislash.
4sIsolated deep farm — Move only with an ally once Juggernaut is missing from the map.
10sThe free revive bought time, but the second life was spent inside the same collapse. Use Reincarnation to delay the enemy while moving toward a surviving core.
13sThe team fight was already lost and you were last to fall. Leave through your own tower route once two allies are down.
—You were at 29% HP and the enemy reached you through dark space. Wait for the team to show before taking the enemy-side angle.
—The magic burst arrived before a defensive answer. Stand outside Storm Spirit's first jump range until his opener is committed.
15sLast man standing during the final defense. Retreat behind the structure when the fight is lost and preserve the next buyback decision.
15sPhysical damage ended the final defense. Break away from Juggernaut after Omnislash rather than trading until death.
The scoreboard showed eight deaths, but five were free Reincarnation revives. I am reading the eight real deaths as the meaningful death count. The pattern was not reckless diving. It was a mix of one isolated route, several last-man exits, and enemy openings that reached you while you were already deep.
Enchantress and Juggernaut each accounted for four hero-kill deaths, so there is no single killer to solve. The shared mechanism was more important: deep routes, enemy initiation, and a late physical threat that your build had not answered.
 0:00Quelling Blade
 0:59Magic Wand
 6:51Phase Boots
 16:56Desolator
 23:26Blink Dagger
 26:26Aghanim's Shard
 36:40Blade Mail
Your opening item path was sensible for lane stability. Magic Wand, Phase Boots, and Desolator gave you lane sustain, armor, movement, and a real midgame damage threat. Blink Dagger at 23:26 matched the offlane job and was used in the next three fight windows.
The purchase order then left the front line exposed. Aghanim's Shard arrived at 26:26 while the enemy was already showing repeated magic initiation and Juggernaut was approaching his physical spike. Your net worth could support a defensive purchase around 25:00. Against Storm Spirit's burst and Centaur Warrunner's lockdown, the magic-survival family included Black King Bar, Pipe of Insight, or a cheaper cloak-based stopgap. The correct choice depended on whether you needed personal spell immunity or team-wide resistance, but the slot needed to exist before the fight chain.
The physical threat needed its own answer. Juggernaut's Butterfly made true strike relevant for your right-click damage, and his Omnislash plus later Aghanim's Scepter made armor and disengage more valuable than another damage component. Blade Mail finally completed at 36:40, after the high-ground chain had already begun.
You also carried large unreliable banks through deaths. The worst was roughly 1,814 gold at 40:49. Convert gold into components at shop trips when the next fight is near, especially when you are already holding the front line and a death can erase the purchase window.
The offlane fundamentals were mostly present. Your farm source split was 87 lane creeps, 53 neutral creeps, and 7 ancient creeps. The midgame route was active, with 19 camp clears and only two meaningful walks, both producing kills. Your 75% teamfight participation and 56% attention share show that you were present and absorbing pressure rather than quietly farming through the game.
The lane-specific mechanic to sharpen is denying. In a hostile offlane, denies are not a cosmetic statistic. They reduce the enemy carry's access to experience and make the enemy support pay for every pull. You had 24 aggro commands, so the hand movement is already there. Add the deny decision to the aggro command.
Your initiation control was also real. Forty-nine seconds of stun is enough to start fights, but the next step is to connect the first stun to the building or pickoff that your team can reach. Your tower damage ended at 21:24, and your team later defended in a deep base position. The offlane cycle is front line, kill, building pressure, then reset. You had the first two more often than the third.
Your positioning was appropriate for a short-range frontline core. Watching six fights back, you stood about 1,300 units ahead of your team's center, which is the correct front-line shape for Wraith King. The replay found zero deaths that bought nothing by diving forward, and only one death while more than 1,800 units from any ally.
The costly distinction was between being forward during a real fight and being forward before the team was ready. TF4 and TF13 were enemy openings on you, not dives you chose. The fix is to stand close enough that Enchantress cannot start on you alone, then move ahead once the first spell has been spent.
Your alive-time distribution shifted heavily toward deep own territory in the late game. That was a symptom of defending a shrinking map, but the 30:33 death still stands out because you were completely alone. At 11:15, four enemies were shown far away and you converted the free-map window once at 23:06, but at 31:20 you died within the next minute after another safe-looking window. Information only helps if the next route respects the enemy's likely collapse.
The team's first structural problem was fragmented fight starts. Lion went 7/18/12, and his deaths repeatedly left your formation without its first disable. Your lever as the position 3 was to call the regroup around your Blink Dagger and Reincarnation, then refuse a fight until Sniper and Slark were close enough to follow.
The second problem was the late defense pattern. Enemy high-ground attempts at 31:57 and 35:38 took multiple buildings with the team split or already dead. At 37:40, the barracks fell while you were alive elsewhere with TP ready. Your offlane mitigation was direct: answer the building call, stand in front of the enemy's first jump, and make Centaur Warrunner or Tusk spend their initiation before Storm Spirit or the opposing support starts a pull, draw creep aggro, secure the ranged creep deny, and keep your body between the enemy carry and the wave. This turns the contested wave into experience denial instead of a lost camp cycle.